What Are Attendee Custom Fields?
Attendee Custom Fields have moved. They now live under Settings → Custom Fields, listed under the “Attendee Profile” resource type.
Attendee Custom Fields allow organizations to collect and manage additional attendee information beyond the default profile data. They serve as flexible data points that can be tailored to match the specific operational, reporting, or engagement needs of each organization. Attendee Custom Fields are also printable within the Badge Label Designer, meaning information can be collected via Attendee Custom Fields and then printed onsite.
Event planners, for example, may want to display attendees’ areas of expertise on their badges. With Attendee Custom Fields, this information can be collected during the registration process and printed directly on the badge without requiring additional workarounds or imports.

Contents
- Where do Attendee Custom Fields appear in the Registration flow?
- Are Attendee Custom Fields a good fit for you?
- Creating Custom Fields
- Configuring Attendee Custom Fields for the Registration Flow
- Filling out Attendee Custom Fields as an Event Admin
- Adding Attendee Custom Fields to the Badge Label Designer
Where do Attendee Custom Fields appear in the Registration flow?
Custom fields are collected from the registrant only and not the ticket holder. They will appear during the Start step and will not be collected in the Assign step. This means that if you are registering yourself and two other people, you will only be prompted to input a response to the Custom Field for yourself as the registrant.

Attendee Custom Fields will also appear in the Event App, Event Portal, and Member Portal where they can be edited (if permitted by the Event Administrators). They can be found under the respective Profile page.

Are Attendee Custom Fields a good fit for you?
Using Attendee Custom Fields is only recommended if your registration flow meets the following criteria:
- Your registration category is NOT using group registration. Attendee Custom fields are only collected from the registrant and not the individual ticket holders.
- The Custom Field is to be printed on badges onsite, along with other attendee details (i.e., first name, last name, etc.)
- This criterion is optional since not every event needs to make use of PheedLoop's Badge Printing system. If you are not intending to print the custom information collected during the registration process (i.e., it is for internal processes only), then Ticket Forms and/or Category Forms listed are likely a better and more flexible option for you.
Creating Custom Fields
- From the dashboard, navigate to Settings

- Select Custom Fields, then select the green Create button
- Fill out the following fields:
- Label - What attendees will see as the name of this field.
- Name - Used internally to uniquely identify this field. Can only contain letters, numbers, and underscores.
- Custom Field Type - Text, Multi-Line Text, Single Select, Multi Select.
- Visible - Check this option if you want this field to be visible. If you do not check this option, the field will be hidden. Only applicable to Attendee Profile resource.
- Editable - Check this option if you want this field to be editable. If you do not check this option, the field will be read-only. Only applicable to Attendee Profile resource.
- Required - If this field will be required.
- Resource - Select Attendee Profile

- Select Save Changes
Configuring Attendee Custom Fields for the Registration Flow
Once your Custom Fields are created, you can start using them for your event. To begin, you must first configure your registration categories to accept Custom Fields.
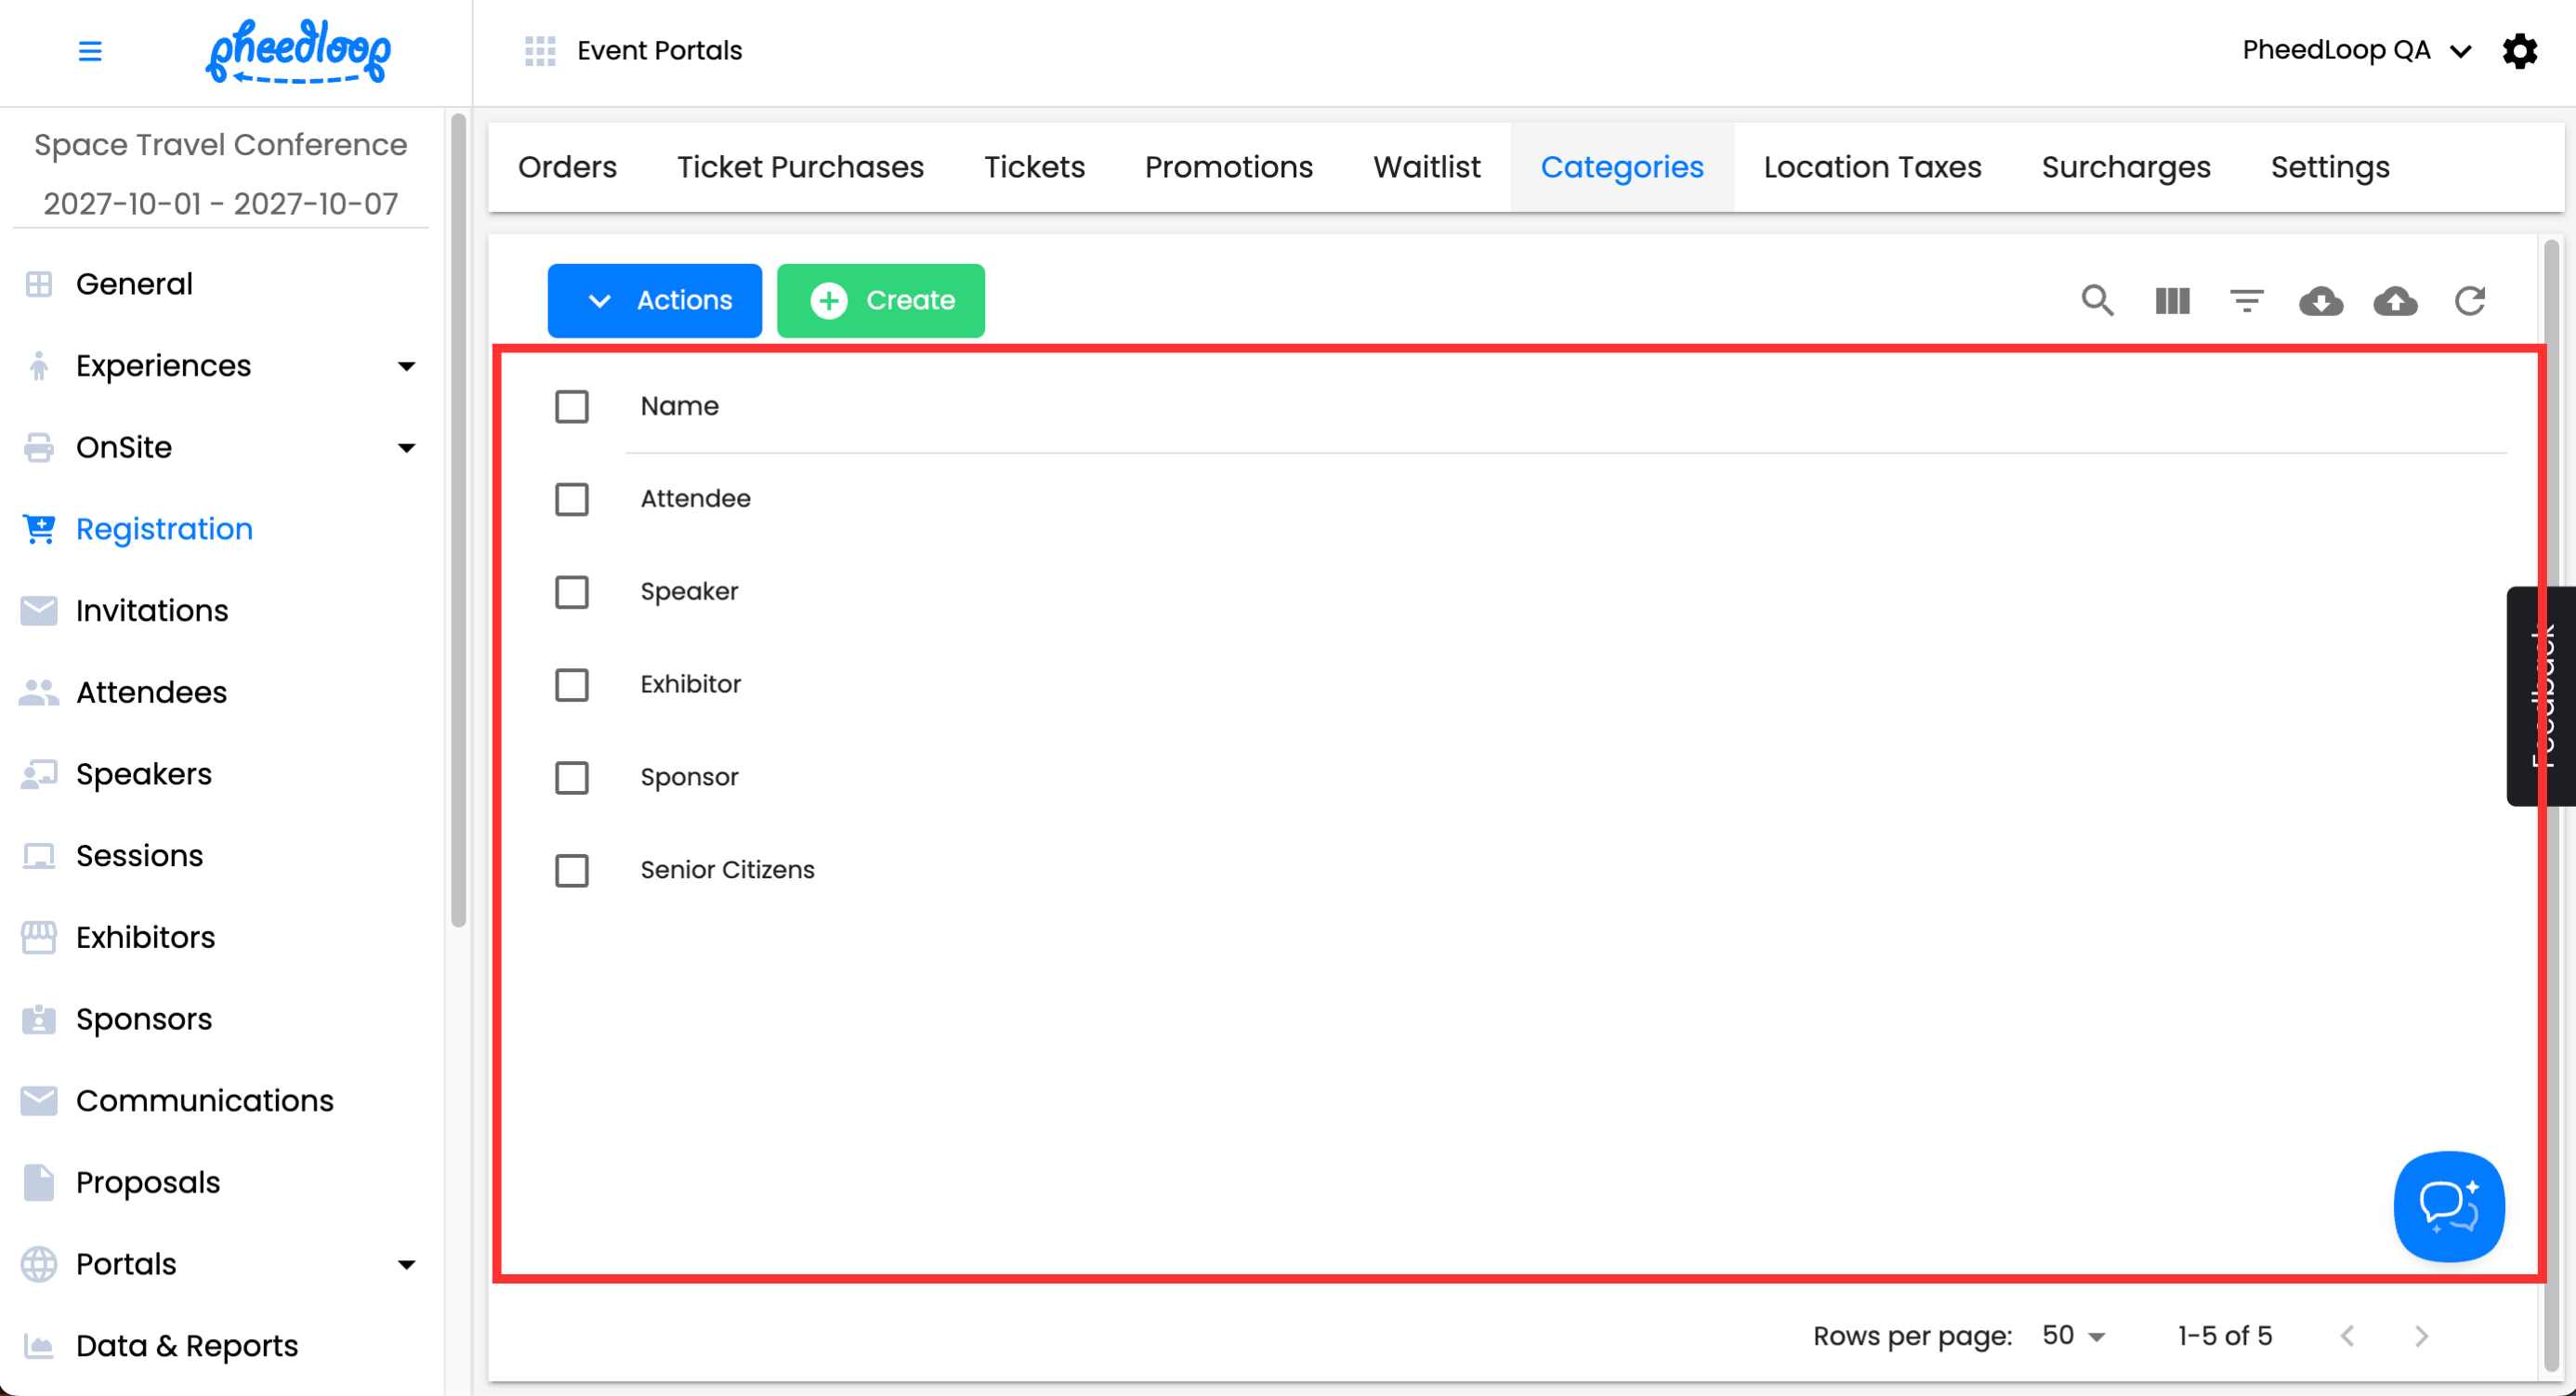
- From the Event Dashboard, navigate to Registration > Categories
-
Select the registration categories that you wish to adjust
- Scroll down to Details
- Toggle on the Collect Custom Fields checkbox
-
Select Save Changes
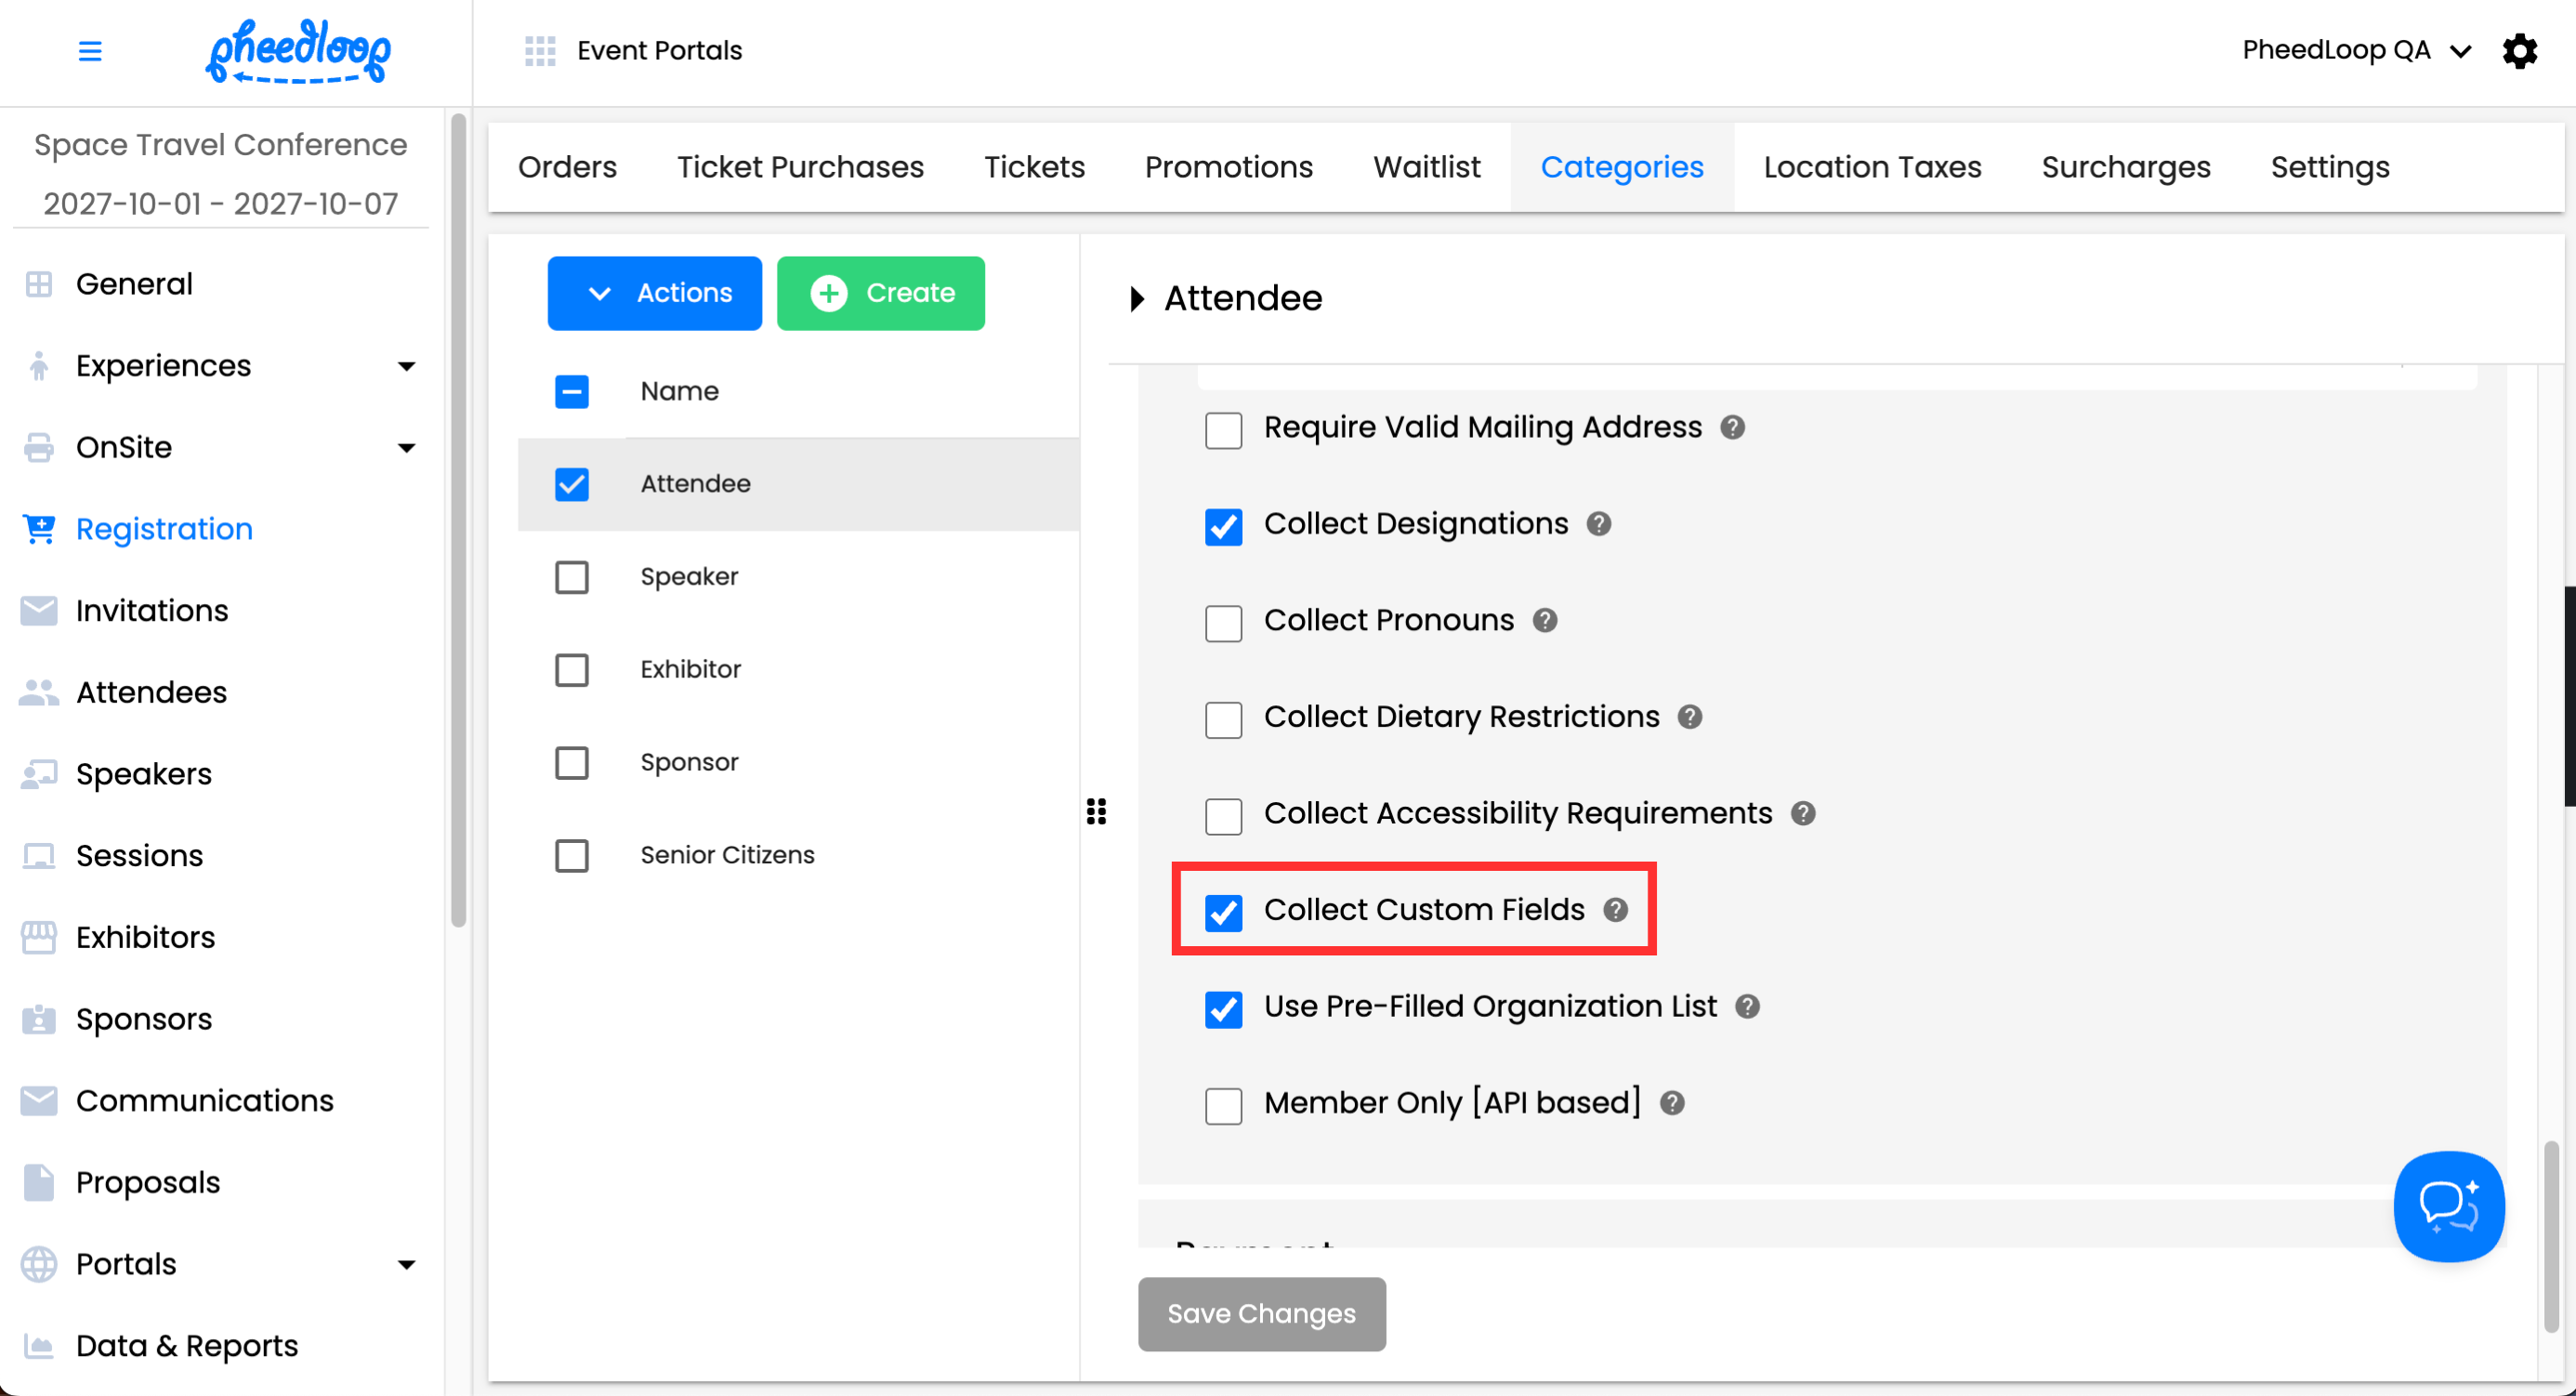
Your registration flow will now include Custom Fields as part of the process. Depending on the configuration of your Custom Fields, they may be optional or mandatory to fill out.

Filling out Attendee Custom Fields as an Event Admin
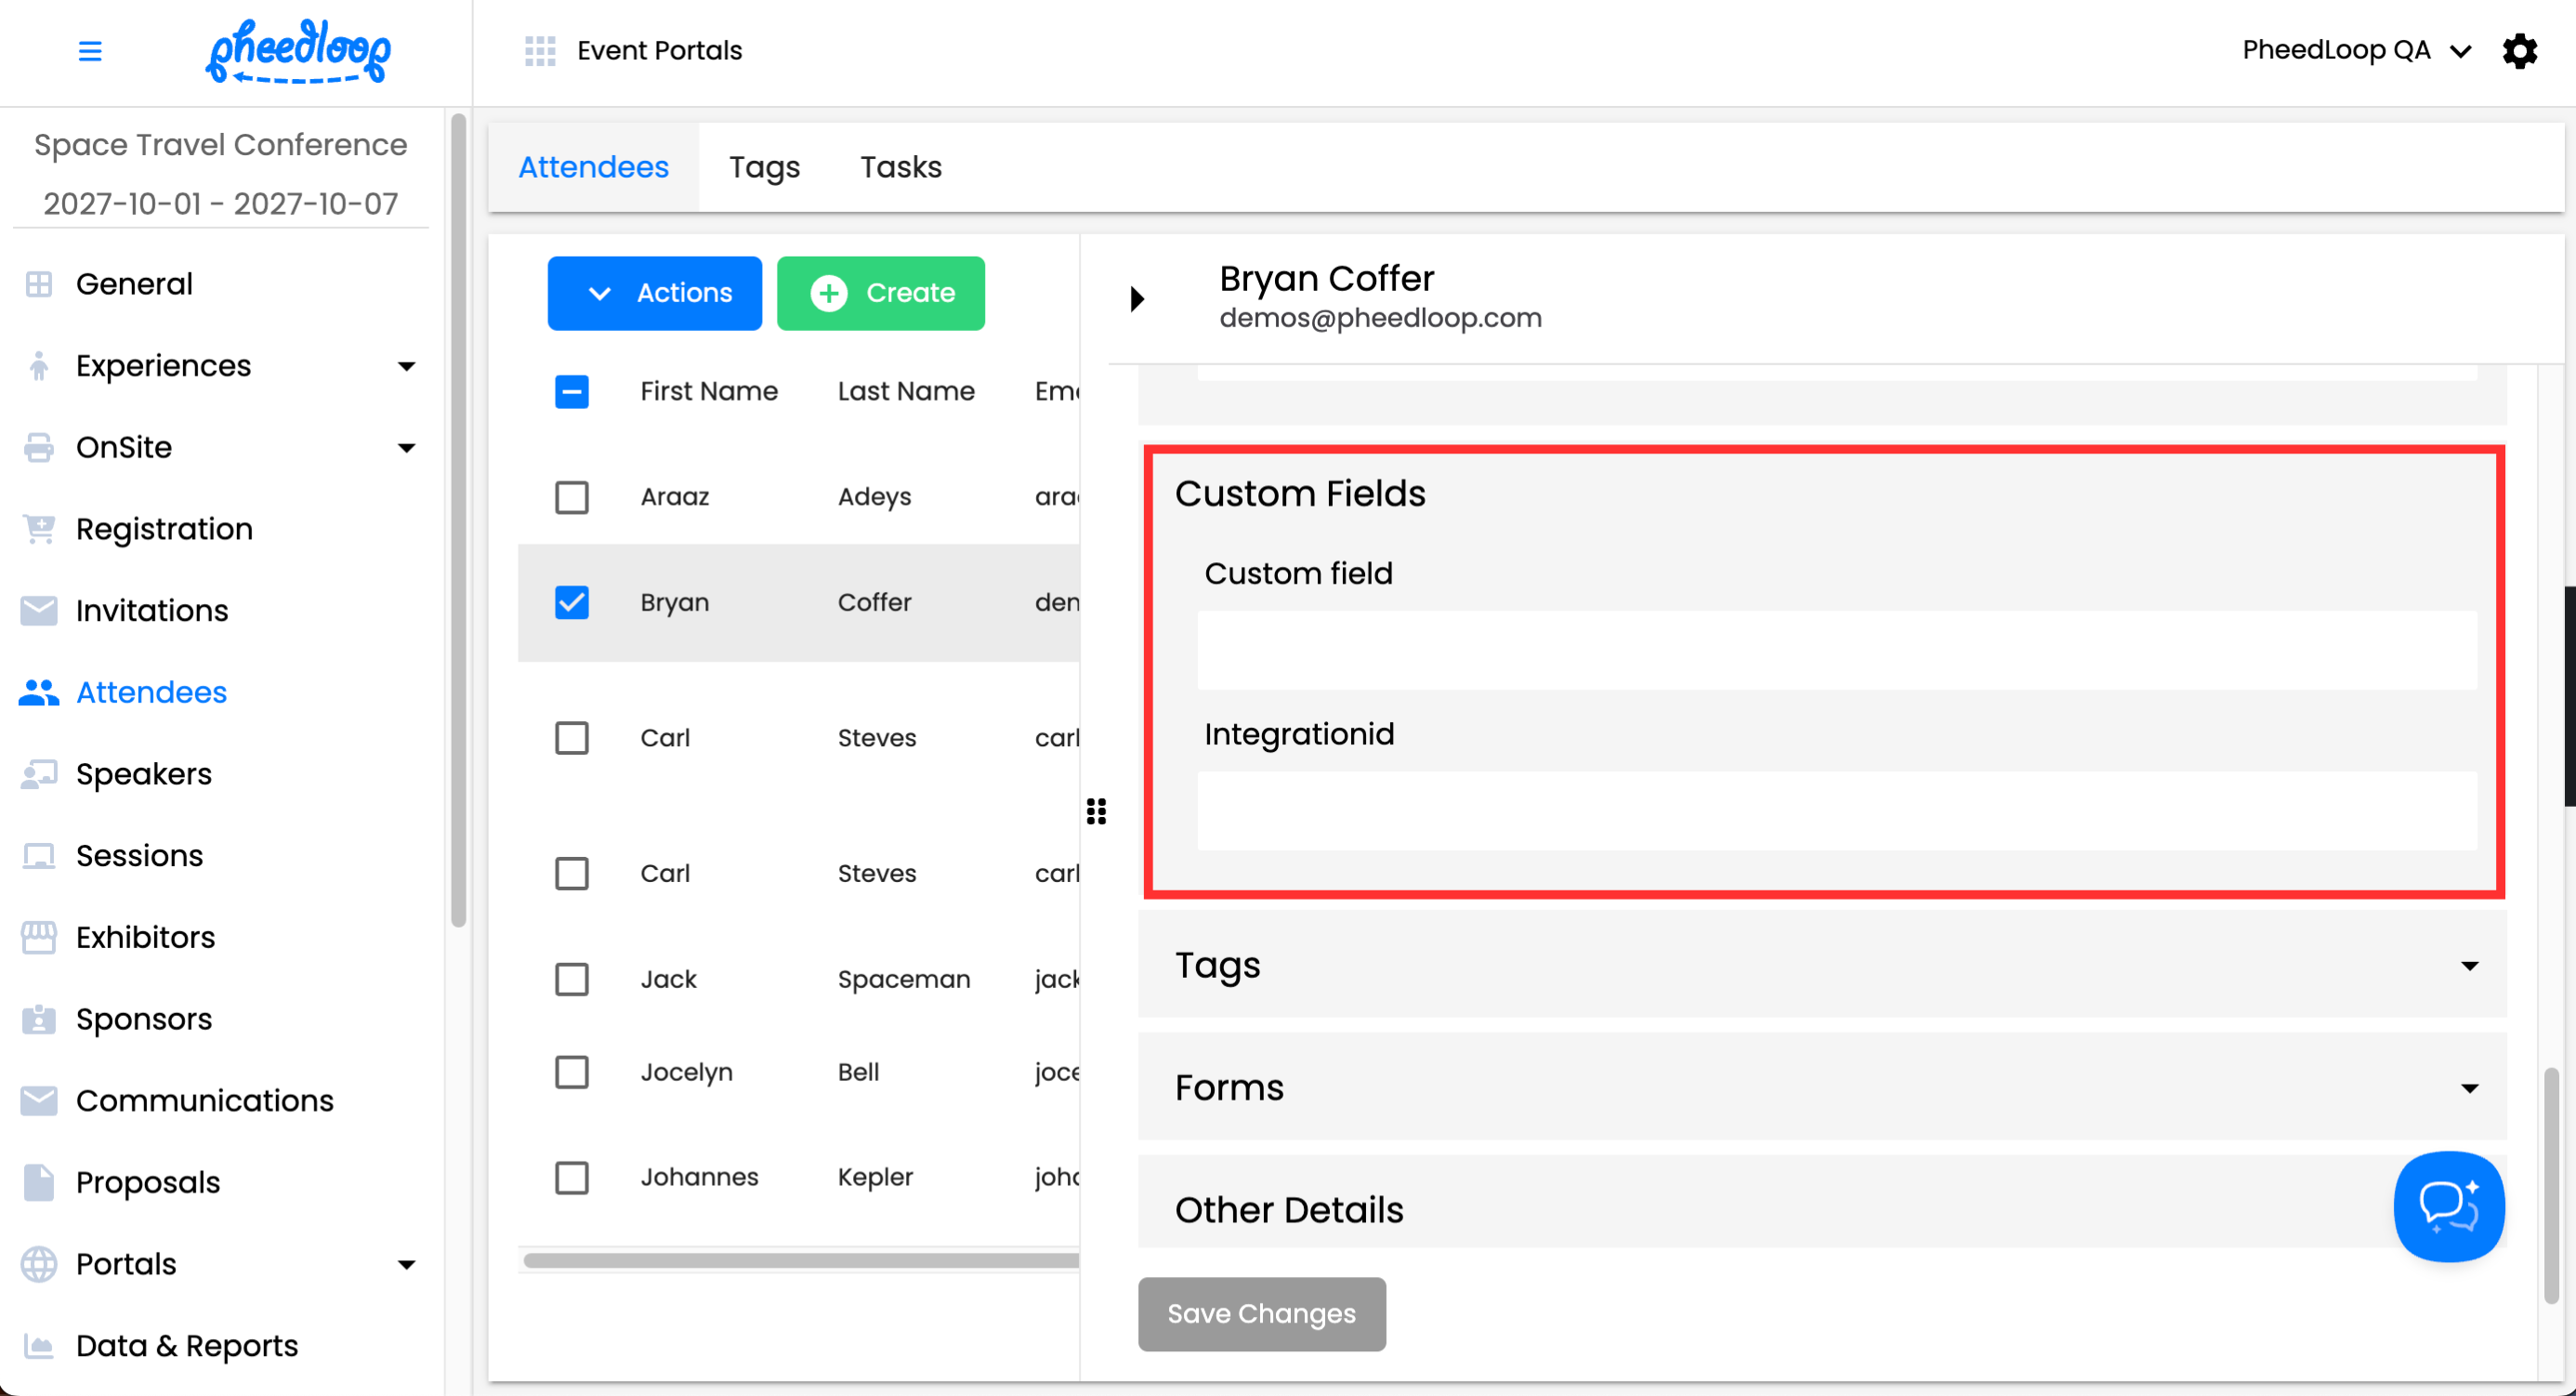
As your registrants complete the registration process and become attendees, you will be able to view and edit their Custom Fields from the Attendees page in the Event Dashboard.
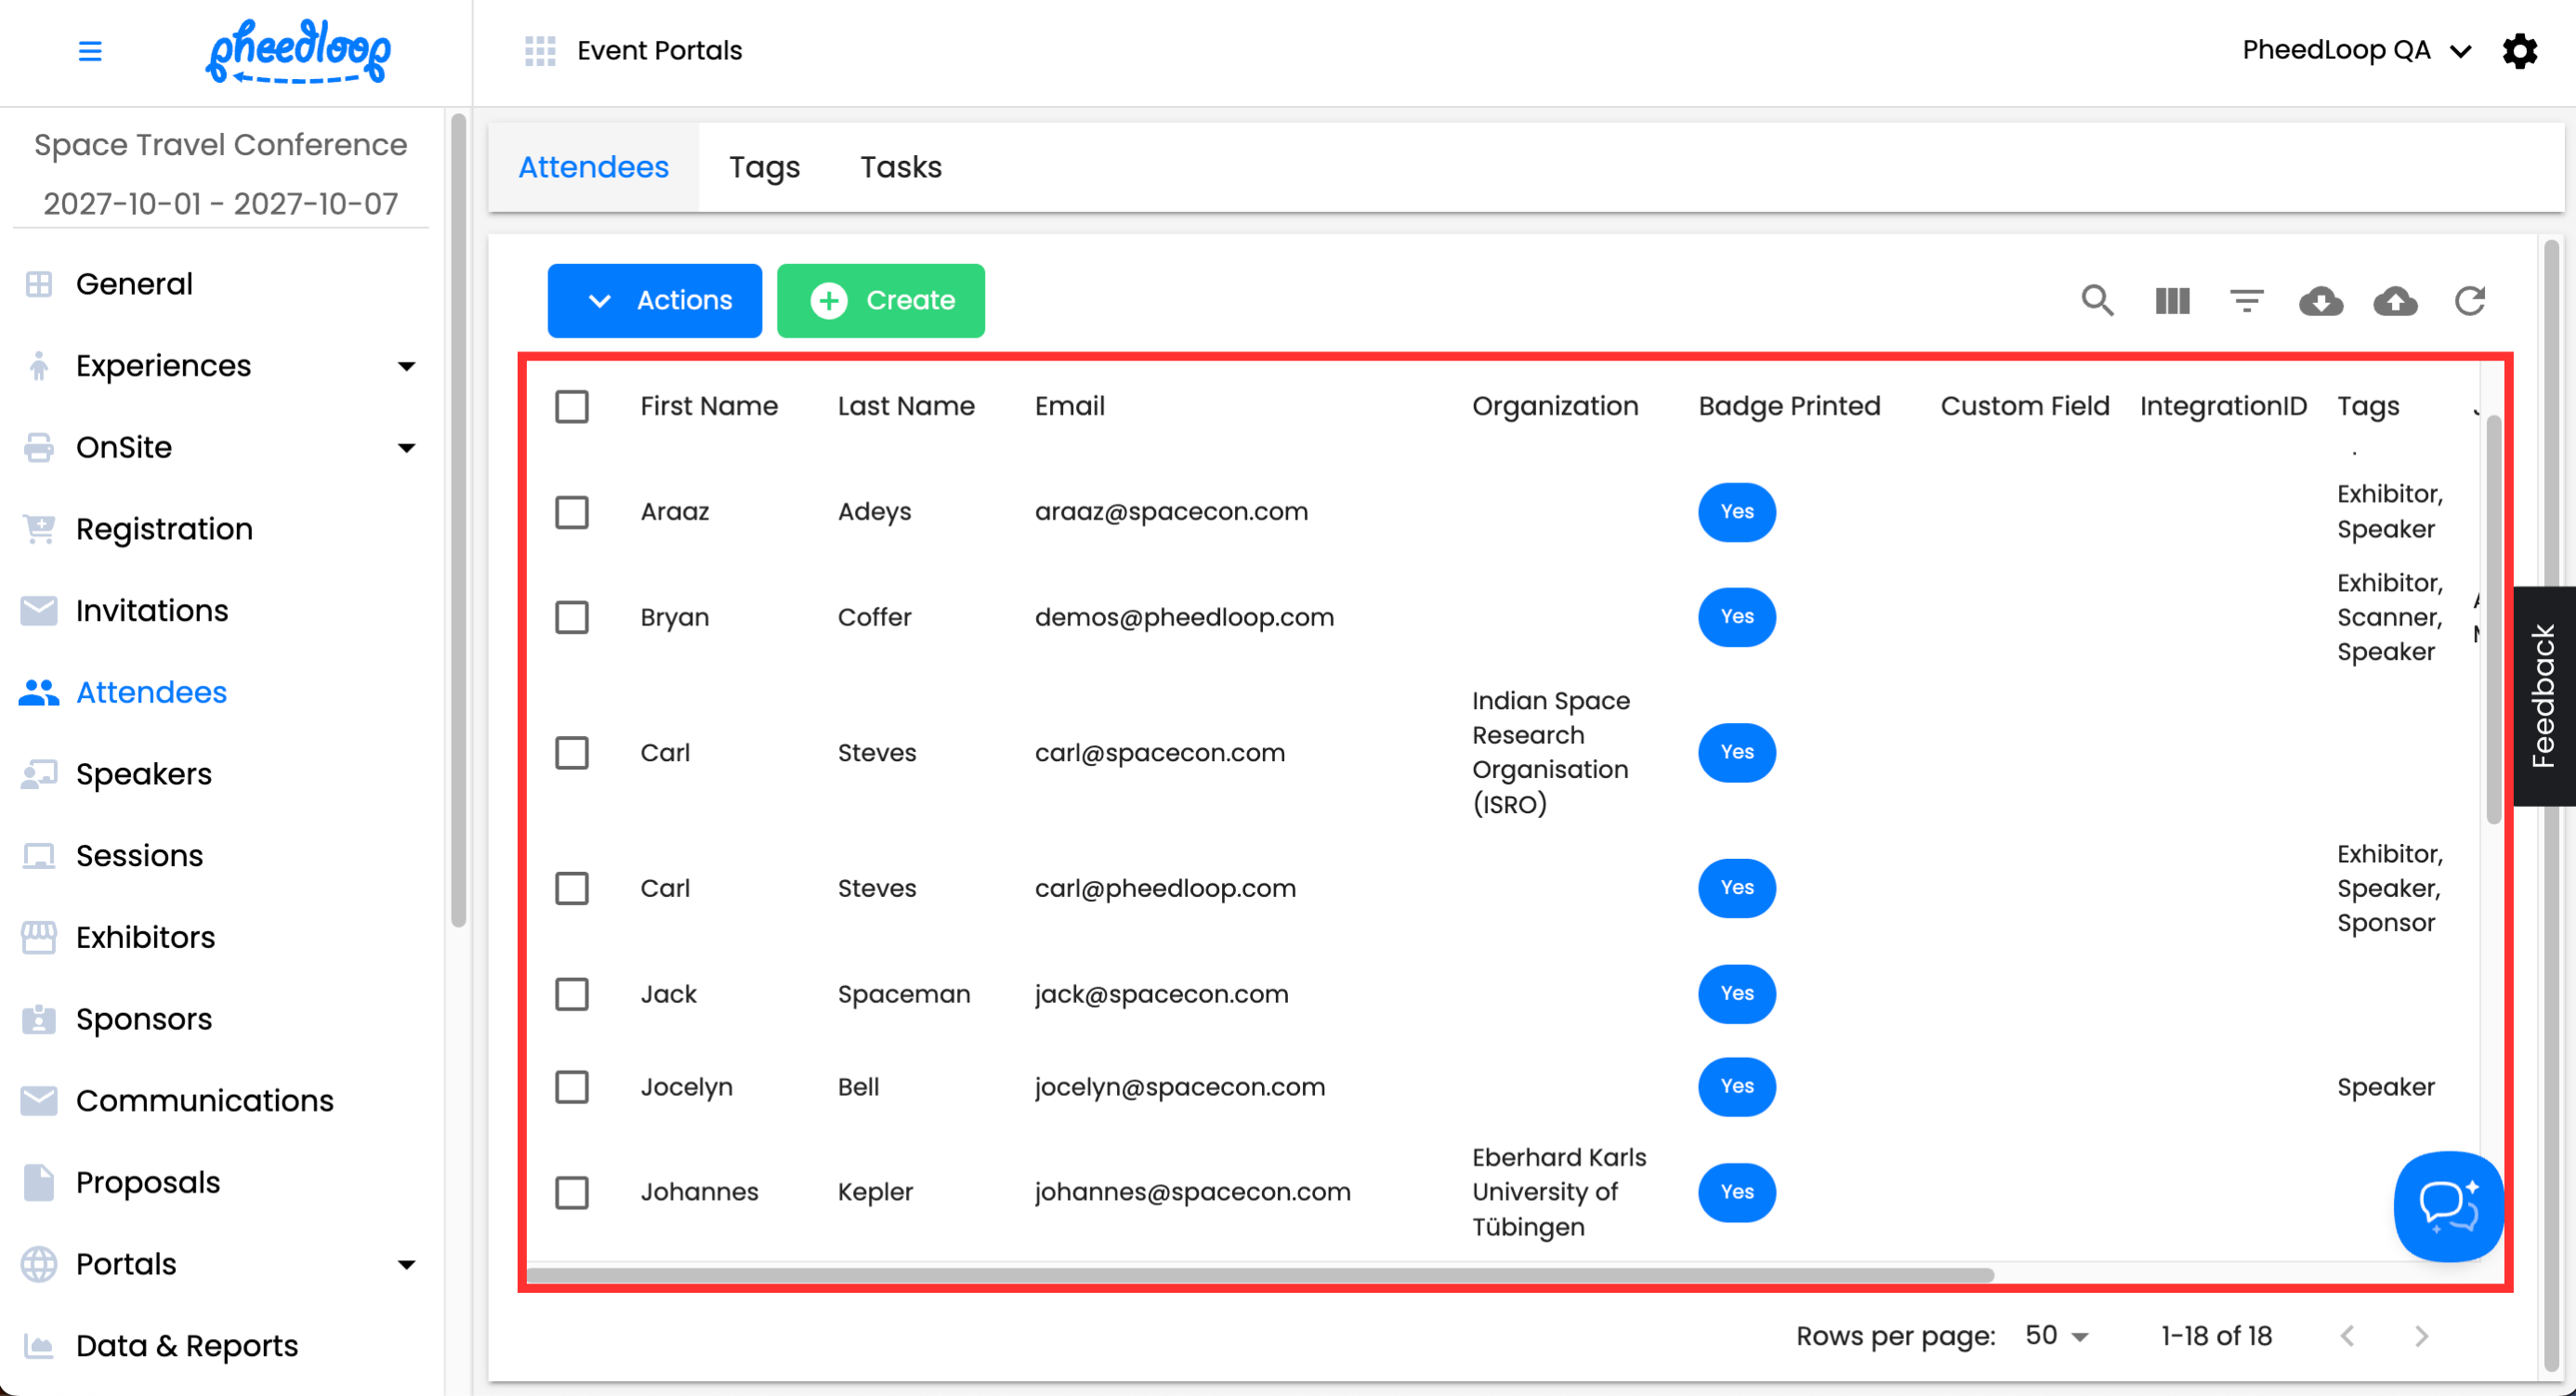
- From the Event Dashboard, navigate to Attendees > Attendees
-
Select the attendee you wish to adjust from the list
- Scroll down to Custom Fields
- Edit the custom fields as you see fit
-
Select Save Changes
Quick Tip - You are also able to bulk upload or edit custom fields as part of your attendee data. Custom Field information is located at the rightmost columns of the Attendee Upload Template.
Adding Attendee Custom Fields to the Badge Label Designer
As mentioned in this article, a popular use case for custom fields is for badge printing. Any custom fields included will be printed out along with other attendee information. For example, if someone enters "Data Analysis" as their Custom Field, that value will be printed on their attendee badge. Custom Fields must be added to the badge template for the information to print.
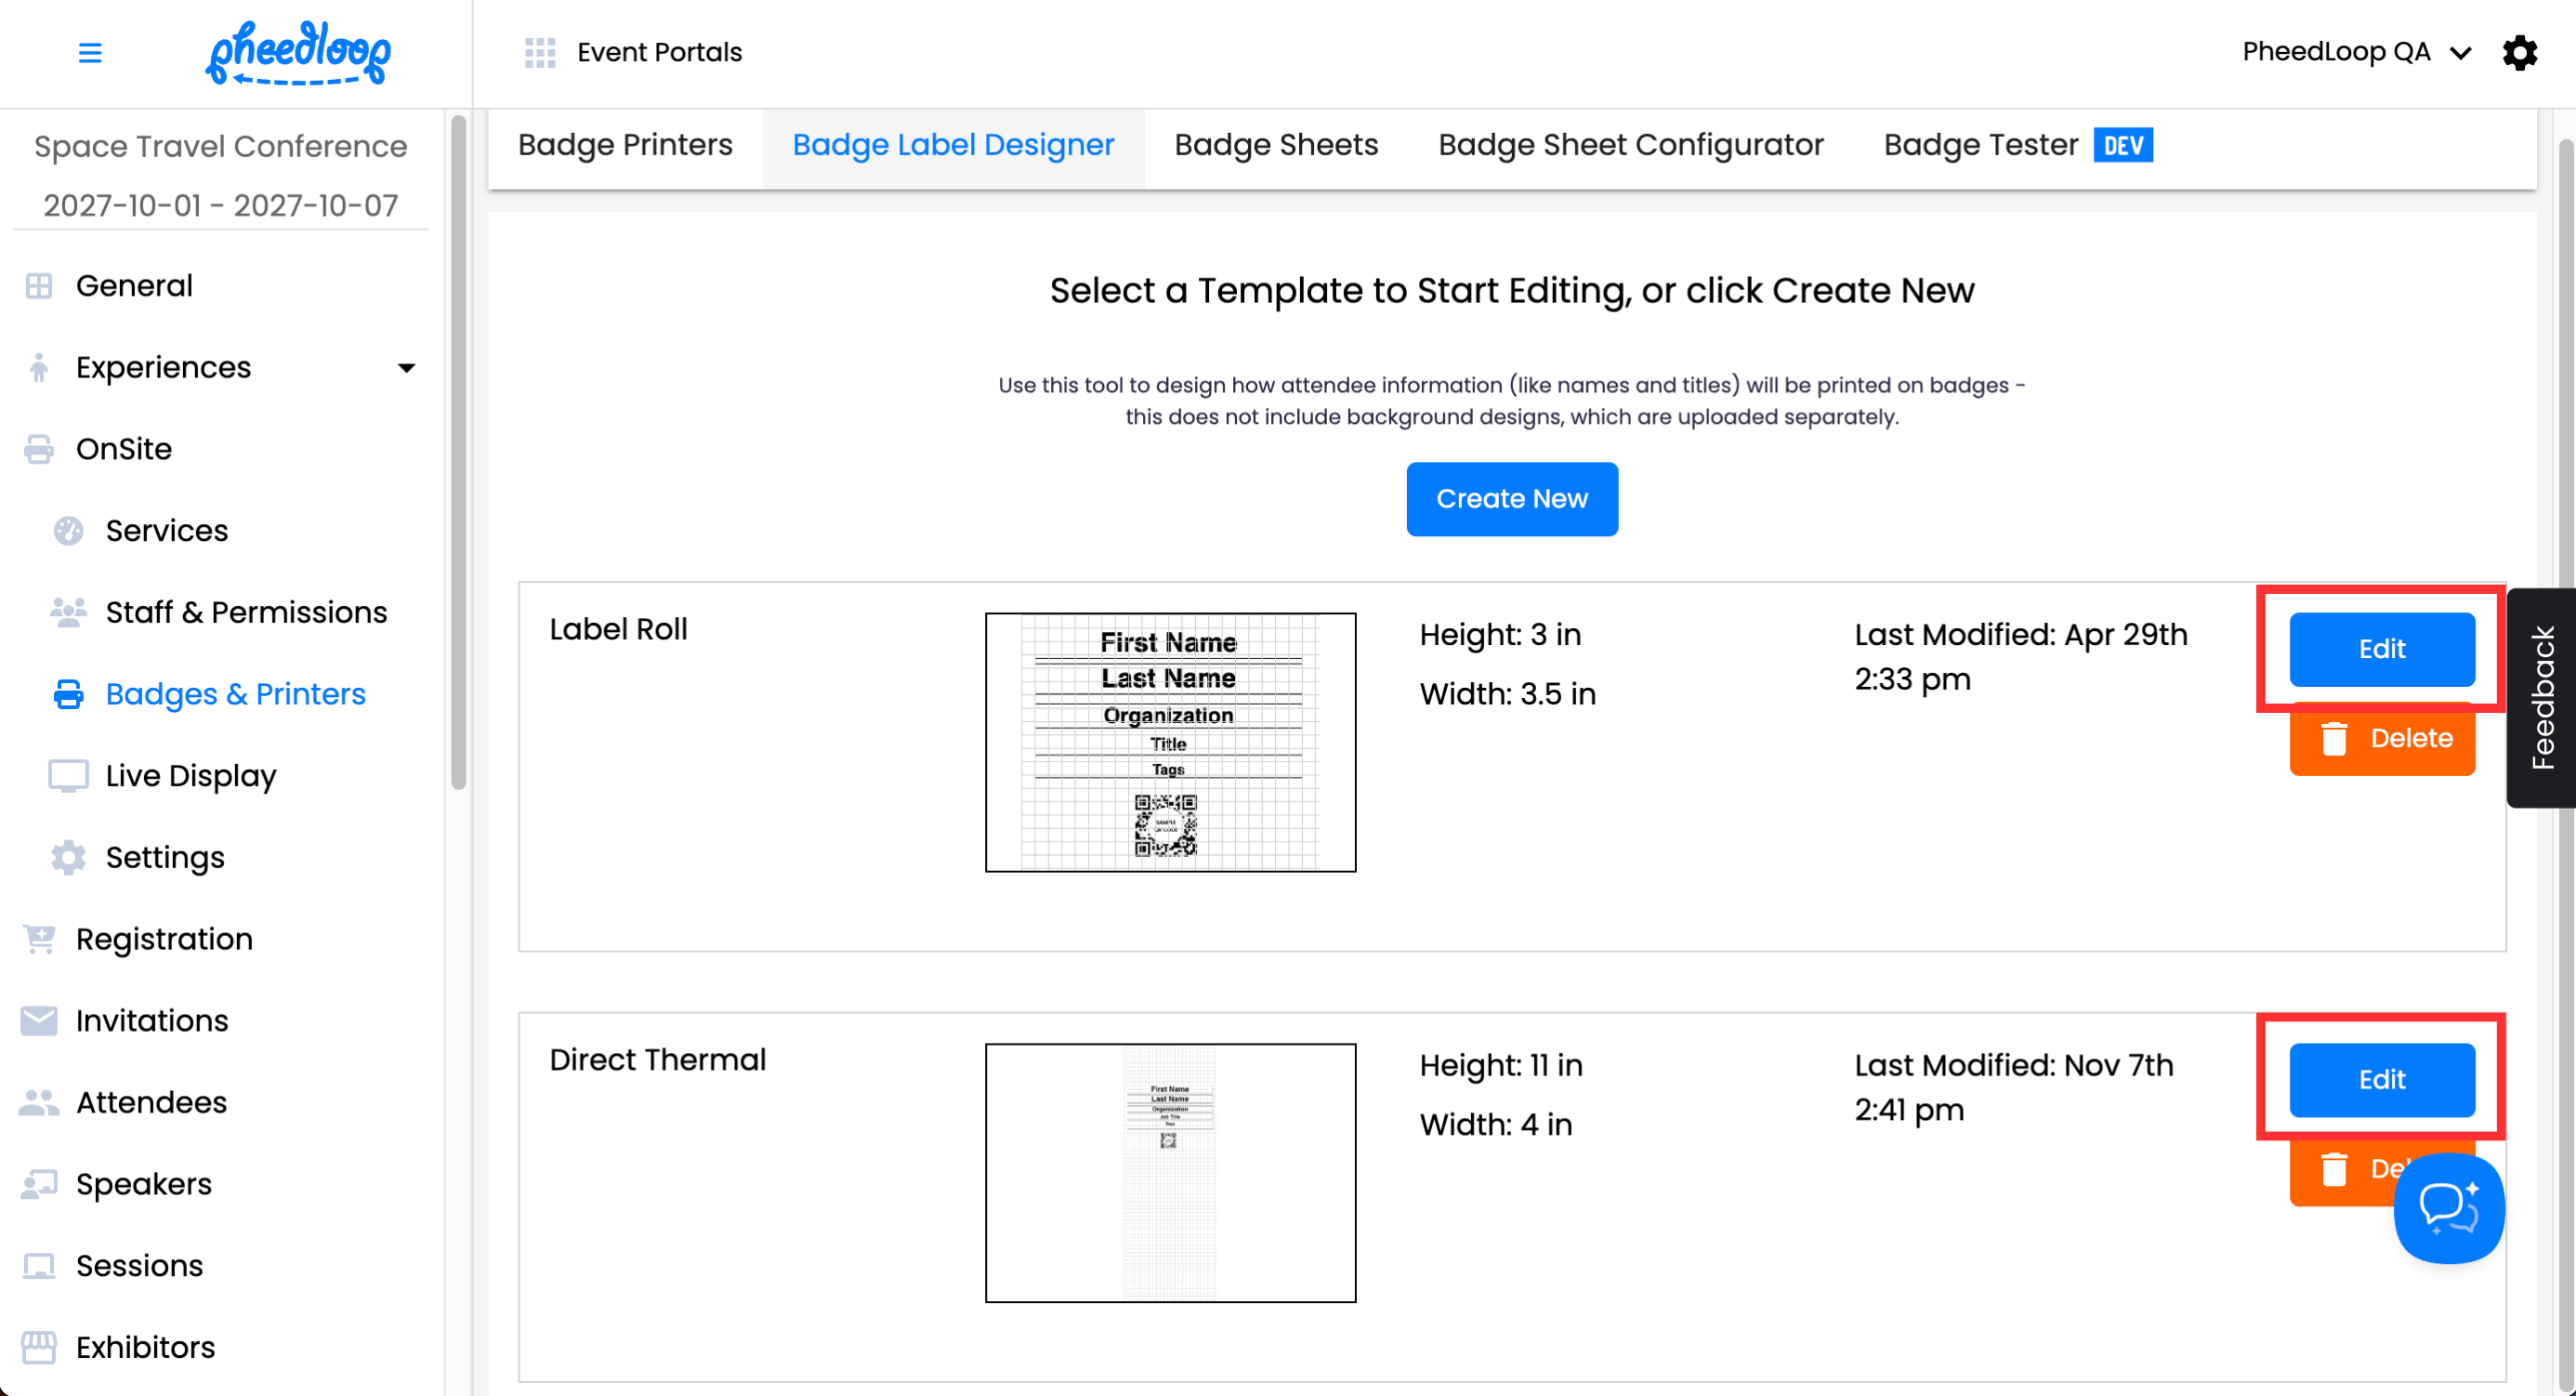
- From the Event Dashboard, navigate to OnSite > Badges & Printers > Badge Label Designer and select Edit for the design you wish to edit
-
If you have not created a badge template, please review our Setting Up Your Badge Label Template for On-site Badge Printing article for instructions
-
-
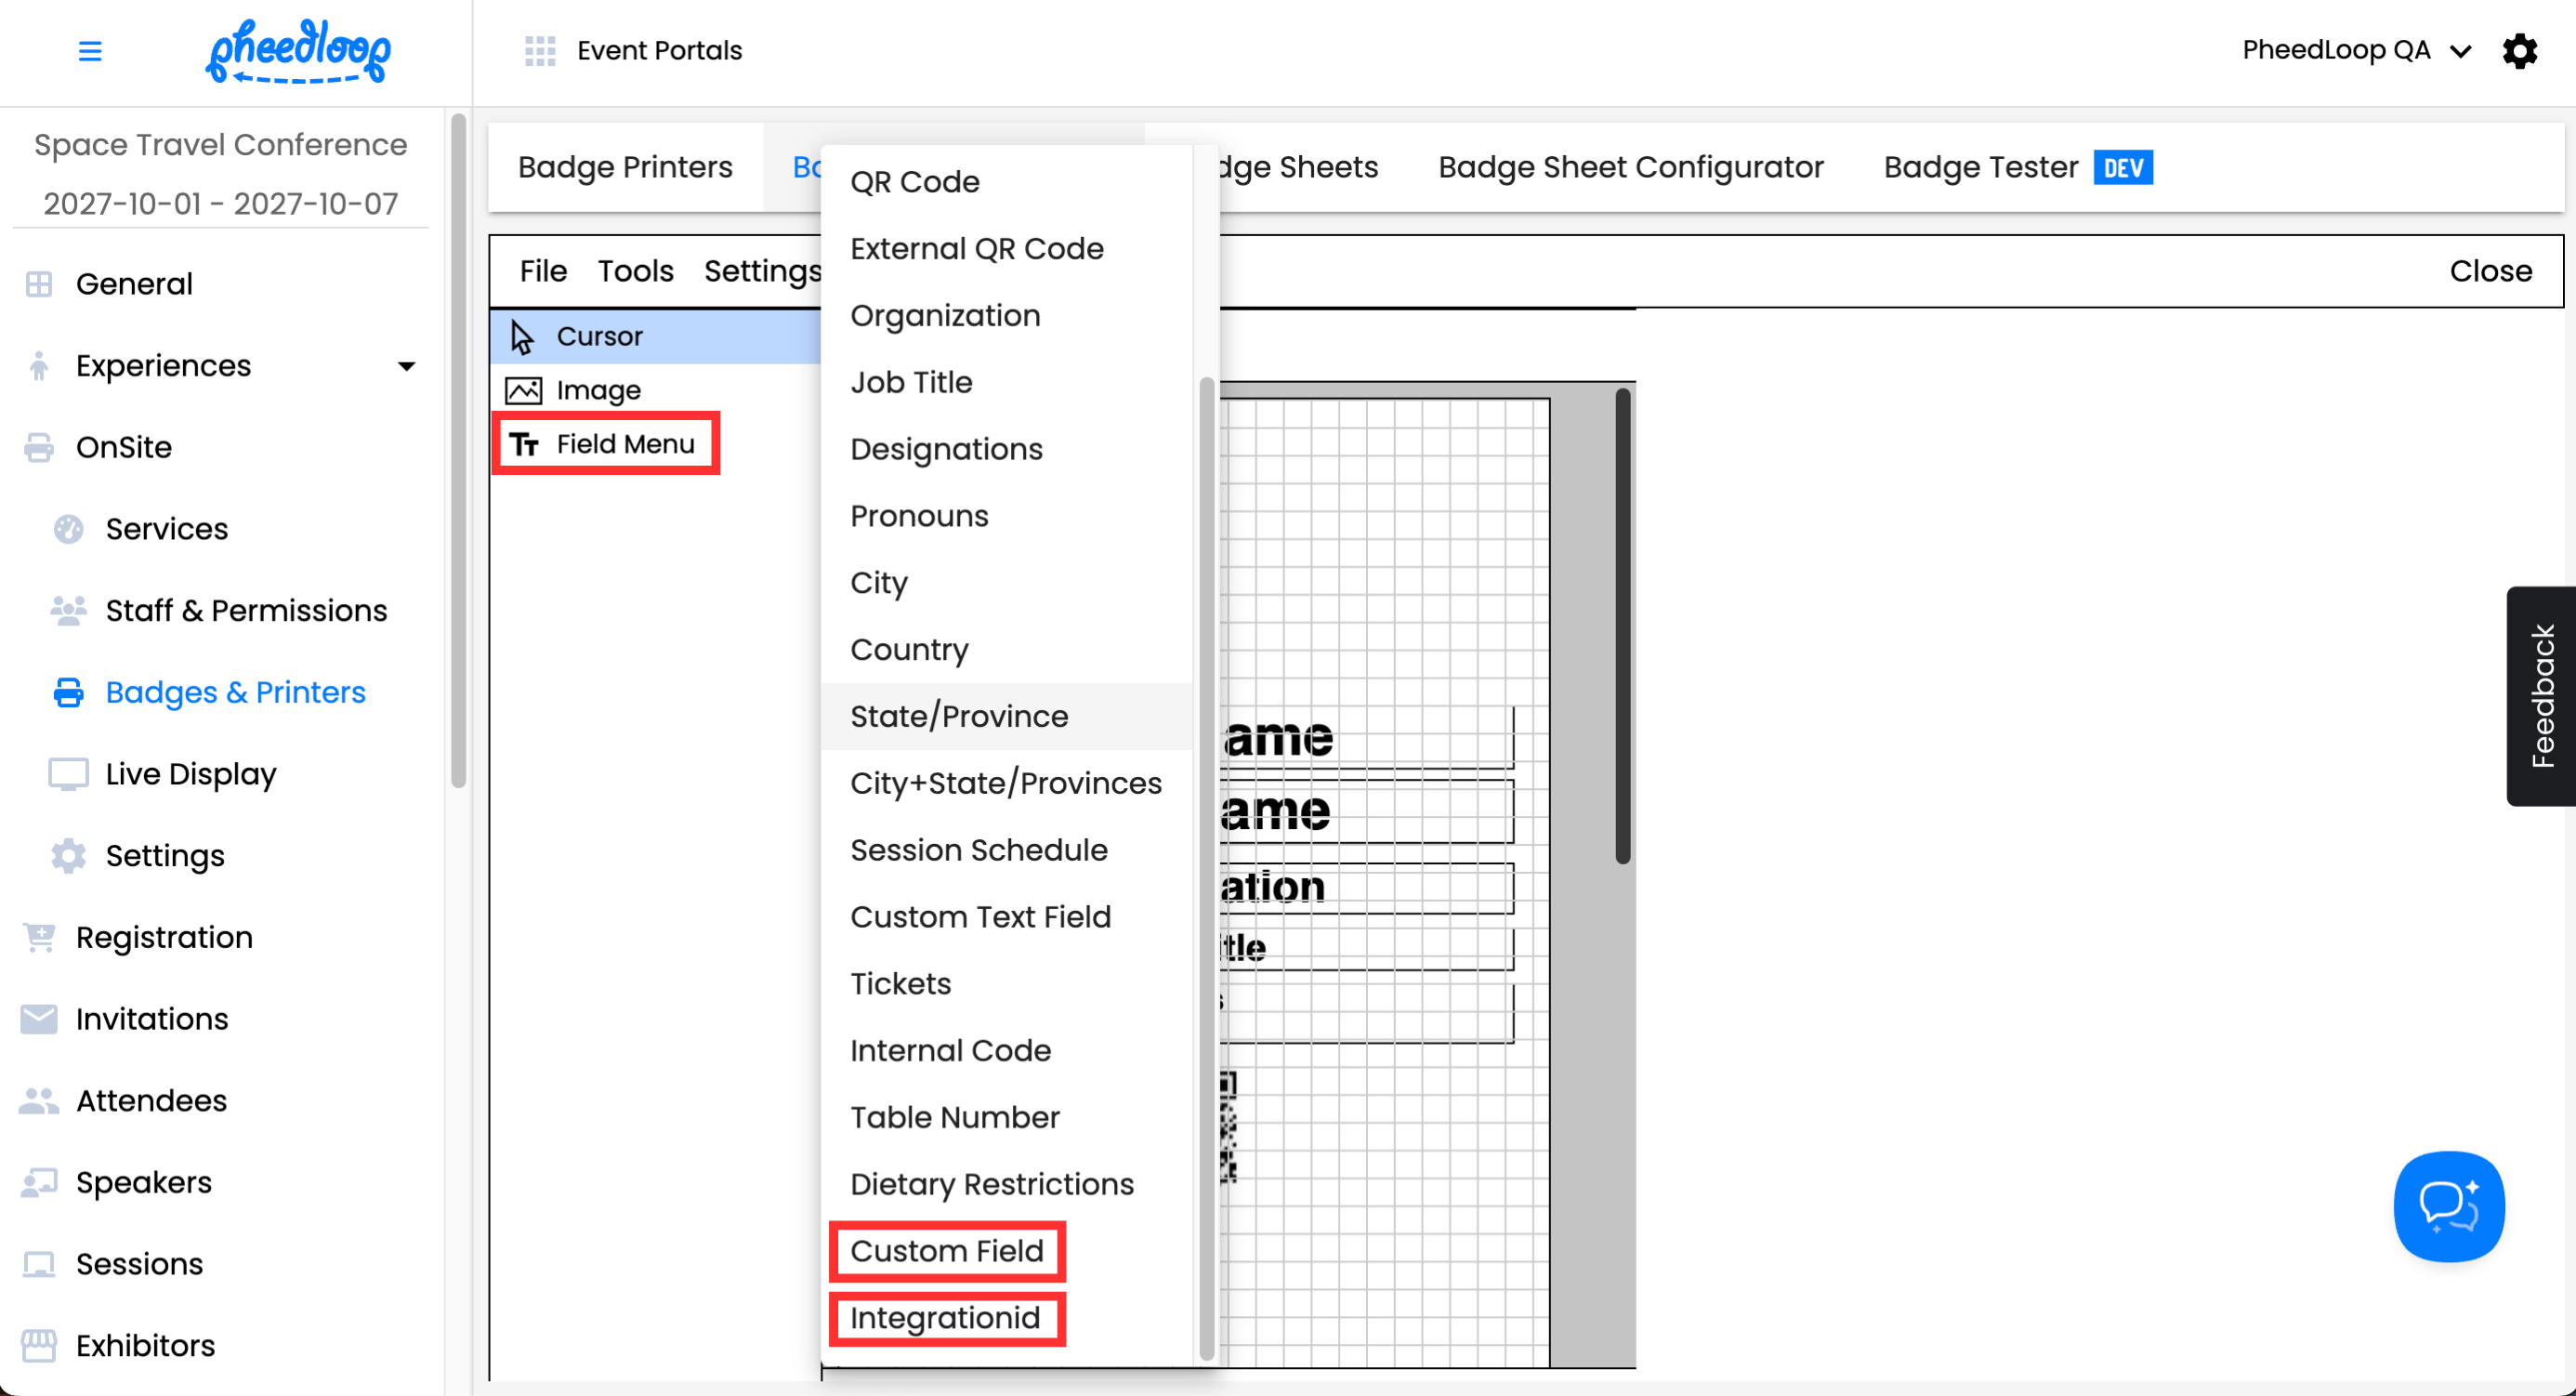
From the left-hand menu, select Field Menu and your custom field at the bottom of the list
-
Place the field in your desired position
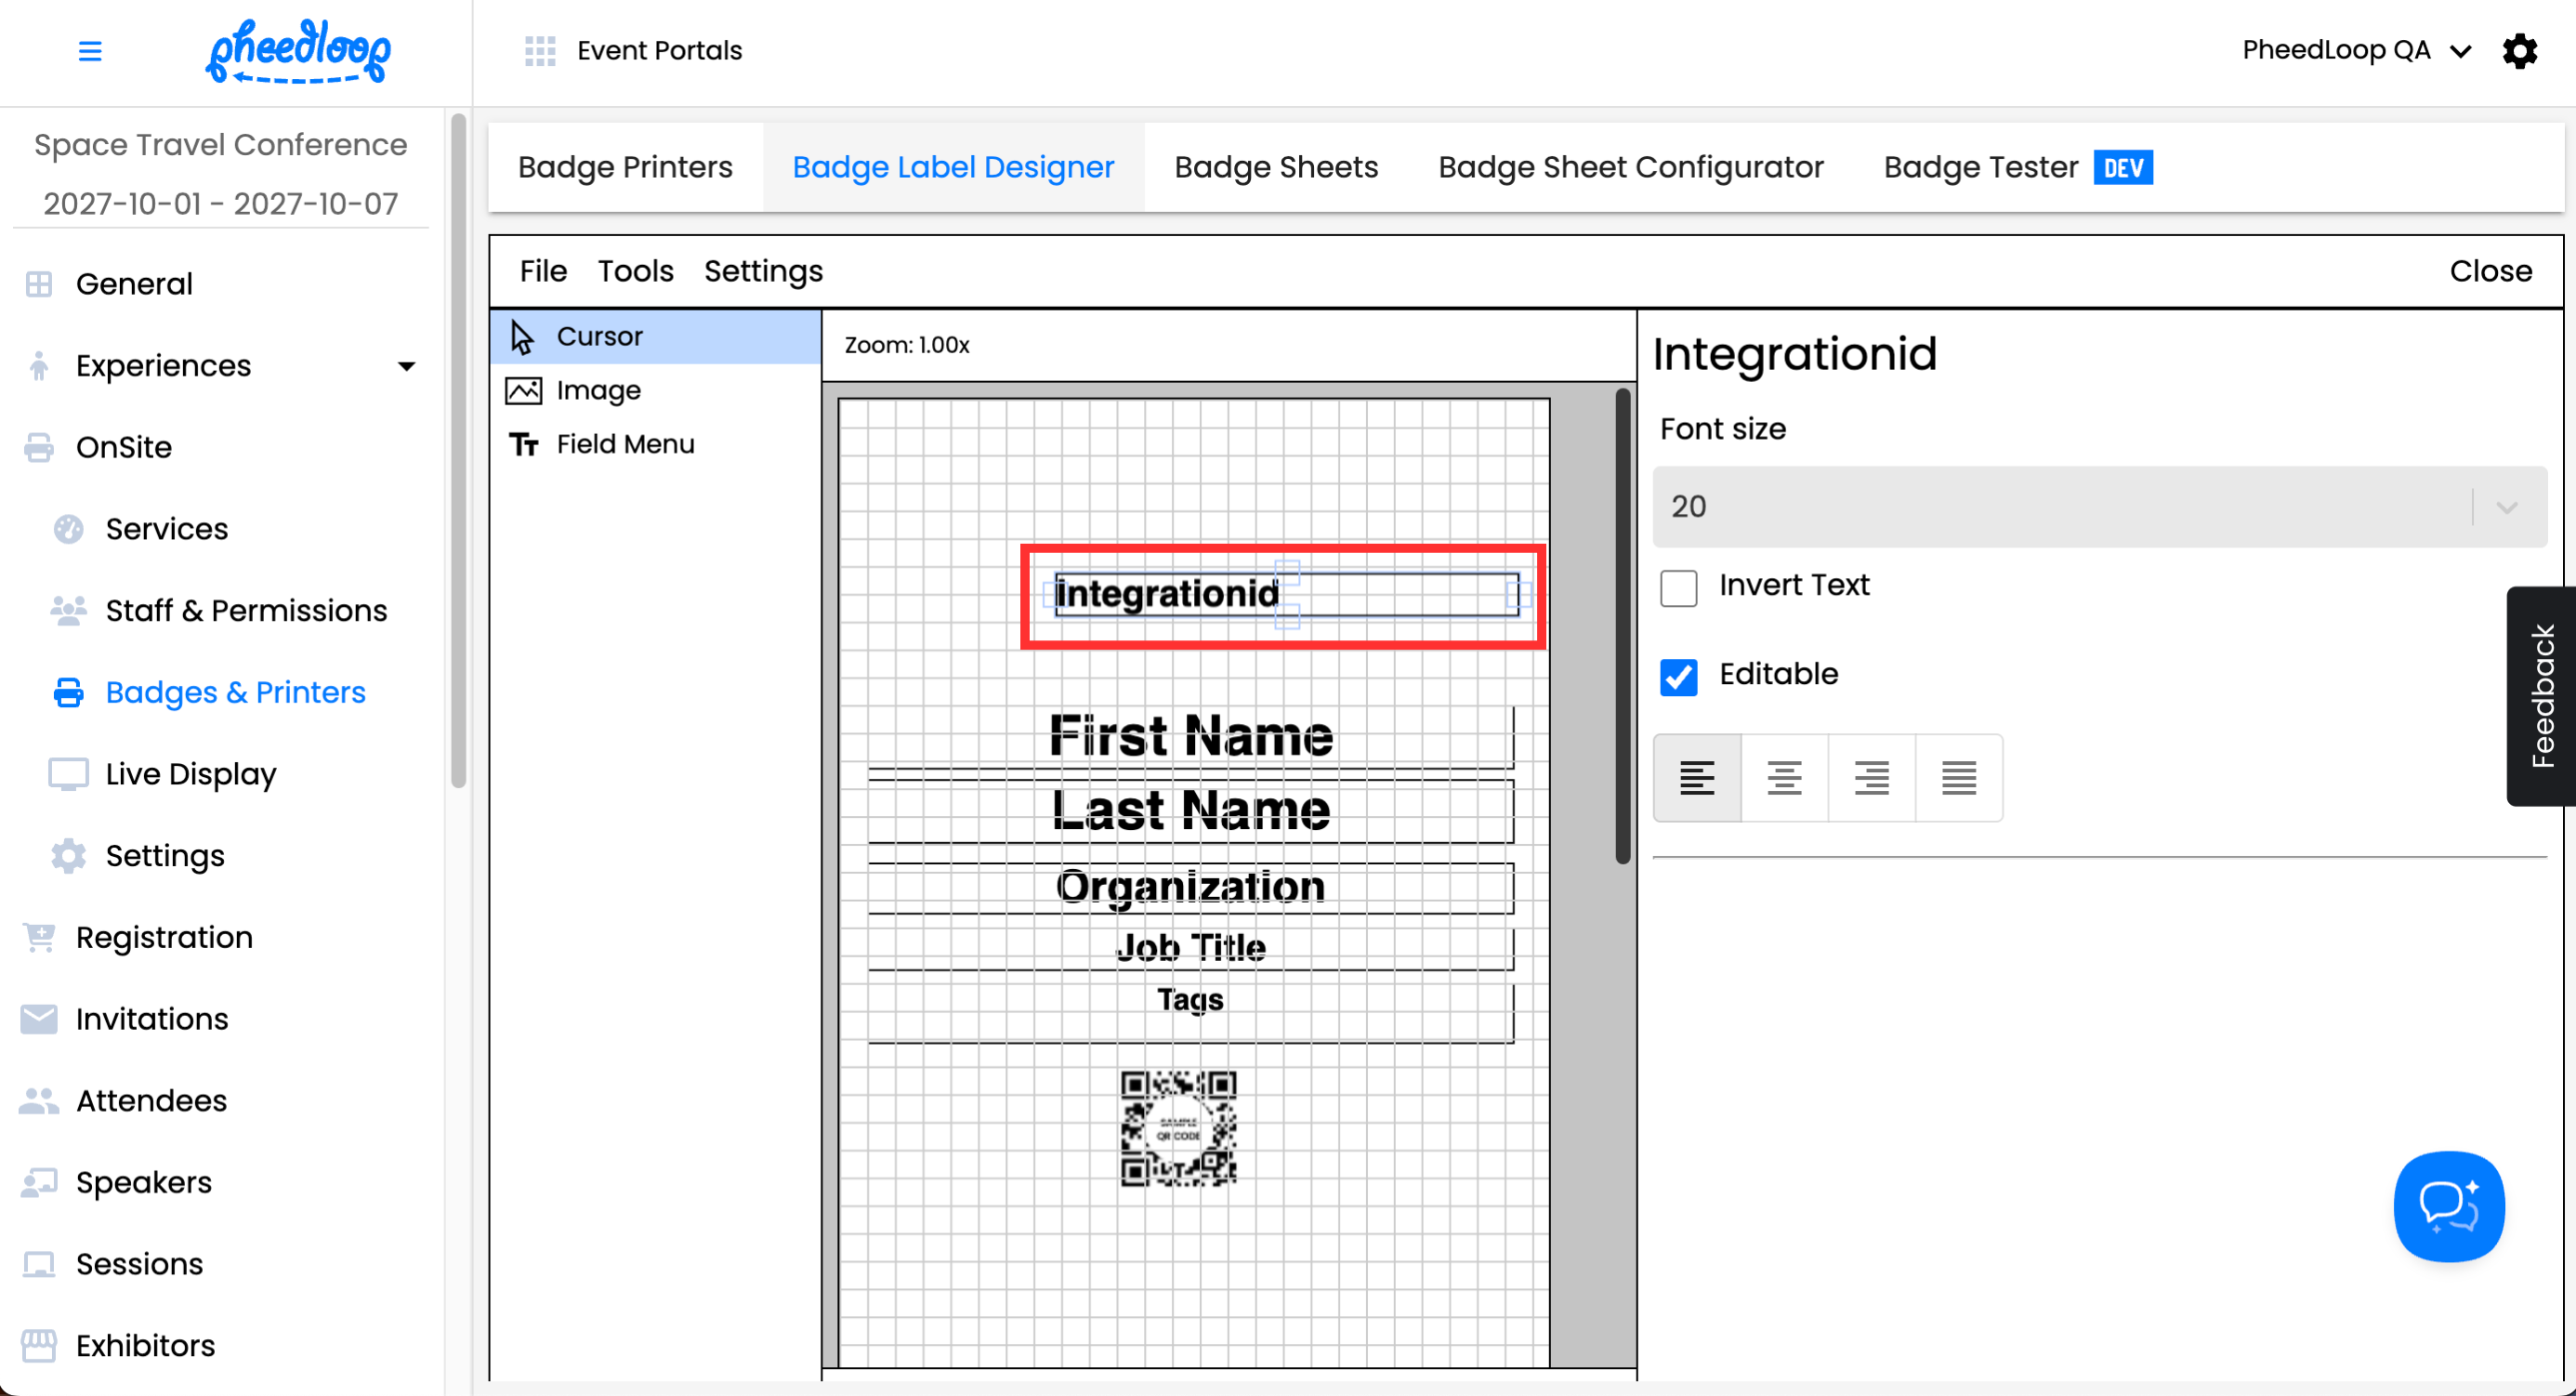
- Save your progress by selecting File > Save
For more information on the Badge Label Designer, please refer to our Setting Up Your Badge Label Template for On-site Badge Printing article.